* HOPCRAFTS' _BLOG

Sunday, December 13, 2009

Finished Pixilation - Edit 1, 2 & 3


I have finally finished all three edits of my Pixilation. I have done three edits because I think they all needed different editing depending on each style of Pixilation they were.

I did the first one as a simple edit because I knew the level of editing in Photoshop was minimal, so I didn't do much to it. The song choice i feel goes well with the Pixilation because its not fast nor is it slow. It also doesn't get complicated with vocals. I think its just the right speed for the Pixilation.

_1;


The second one I did more editing in Premiere as I felt it needed it due to the moodiness of the Pixilation that I did in Photoshop. I added a couple of 'blips' where harsh beats were in the music. I also added a better title where it slides in and slides out. Also on the ending I got some inspiration from a group member and linked the Pixilation to the final ending screen. Which i think ends it smoothly.

_2;


Finally the last edit I wanted to use a different song as the edit in Photoshop is completely distorted compared to the others. I wanted this entirely synced with the music. So I used the beat to determine when the video is showed. I also did this with the title and the ending to make it all one sync. I am very happy with how this works even though it took so long getting the video to come in and go at the right place in the music.

_3;


Overall I am very happy with all the edits. Im very happy out the Pixilation story itself too. I am pleased we incorporated a member of the group into the Pixilation and to interact with the piece of paper.

Im sure I will use Pixilation again and I have learnt many techniques from this project in both Premiere and Photoshop too.

Beer Can Tester


Well when i was thinking of Pixilation ideas, this idea came to mind instantly. I thought of some sort of sequence with beer cans and then to make it sync with the music, weather it be in an equalizer type of sync or just to go with the rhythm. Drum and Bass dance music tends to have a lot of rewinding in the sets. So i thought i could link that to the sequence. Also when editing the video in Premiere i noticed that the background distortion was moving a lot like an sound equalizer world, and i think this goes well with the music.

Here is the tester piece;

One Shot Short - Quality


Presentations are looming and my group still only had a crap quality upload on Youtube. So I went about going back into Premeire to export a high quality version. After playing about with export settings for about 2 hours and not finding a decent quality one, I got somewhat annoyed. Then I noticed my school boy error of editing in NTSC format. So I finally got a decent export setting and here it is;

Monday, December 07, 2009

Bear Can Pixilation


Well I have started to do my own pixilation and have taken 200 photos for it. I have made it a rythm type pixilation and is just a test type pixilation to see how well I can sync it with music. I have got something in mind with rewinding the pixilation half way through as the music rewinds. Hopefully it will come out well.

Heres the original photo I took for the bear can setup;


I like the setup but i think the back grouds a bit dull, so i changed some bits in Photoshop and resized it to fit widescreen;

I changed the shadow/highlight so that the cans are a little brighter and the background darker. I then added a photo filter to give it a blue effect and finally added a poster edges filter which changed the background dramatically but kept the cans clear and visible which is exactly what i was after.

I hope to play in Premiere as a next step.

Sunday, December 06, 2009

Batch processing


This was the next step on our Pixilation we made the previous week. You have 280 photos and they all need to be re-sized to be friends with Adobe Premiere. So we learnt Batch processing. We were basically taught how to record a number of commands in Photoshop and then apply that to the rest of the folder containing our photos.

I did three sets of these. Each with different filters and settings giving different effects. First of all they all had to be resized to 720 px x 576 px. This was so they all fitted in to Premiere's stage without being too big or too small. This also cuts the file size down a lot.

These are one out of the set of photos that i think best shows the filters and effects applied.

Original;


_1;

I have altered with the hue/saturation, added a photo filter (underwater) and also adjusted the curves.

_2;

I thought the last one was quite bland and faded. So i altered the shadow/highlight, adjusted the curves, altered the colour balance and added a vignetting effect on the corners.

_3;

For the final one, i wanted to go a bit mad with the filters. So i changed to black and white initially, altered the shadow/highlight, added a mangeta photo filter 50% and then added a cutout effect.

I am looking forward to the next session were we compile our photos to make our pixilation.

Tuesday, December 01, 2009

Pixilation NOT Pixelation


Here we start our final part within this module. Its Stop-Frame Pixilation. This is where a series of photographs are put together to make a video type animation. Im looking forward to experimenting with this. I have come across the subject before, but not gone into much detail with it. I have never realised how widely ranged this technique of media is used. Its everywhere, a lot of adverts and music videos use this technique. It seems cheap but yet well organised and executed.

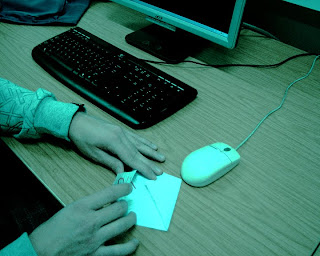
Our first lesson consisted of watching one example of pixilation and then just going out and shooting our own. I was put in a group with Alex and Keiren. We looked in to going to The Aboretum to get ideas, to no avail. The coldness dragged us inside to doing something that we ourselves did not appear in. The journey of a piece of paper is what we came up with. I was happy with this idea and i think we did well with the flow of a picture taking. Next lesson we will put our series of photographs together and see how well it actually came out, hopefully it meets my expectations.

A good example was one that was on the news a while back, where they took a series of images of sheep and made a dog round them up in the hills of Yorkshire. They then handed these to some animators who turned it in to a space invaders type animations. I can't find the video anywhere though, will post up as soon as i do.

This is one that Andy Love showed us and i think its great, i just goes to show what you can do. It looks like the person is actually skateboarding on him, but frame by frame photos can create such effects;

Name:
Location: Shottingham, United Kingdom

Link

Previous Posts

Archives

Powered by Blogger